Overview of Flutter's navigation and named routing features
Implementing named routing in Flutter
- Implementing named routing in Flutter is a powerful feature that can help simplify navigation in your app.
- While it is possible to define routes using a Map in your MaterialApp widget, another approach is to use a routing class.
- A routing class can help encapsulate your routes and provide a more organized and reusable approach to navigation.
- In this article, we will explore how to implement named routing in Flutter using a routing class and how it can benefit your app.
Creating a Routing Class
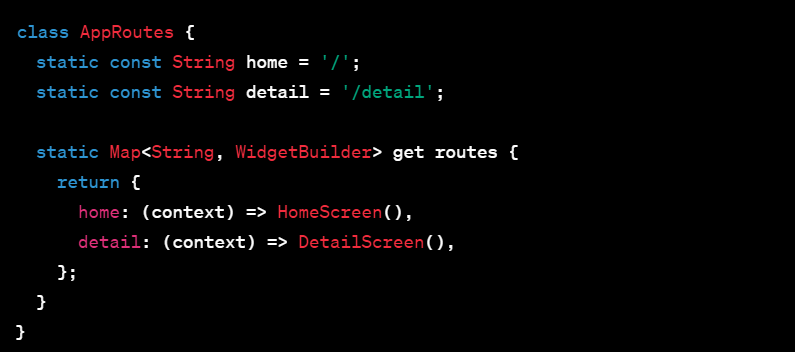
- To implement named routing using a routing class, we first need to create the class. The routing class will contain a static method that defines the named routes for our app.
- In this example, we define two named routes, 'home' and 'detail', and create a Map of String keys and WidgetBuilder values that returns the widget for each route.
- The routes method returns this Map, which can be used in the MaterialApp widget to define our app's named routes.
Defining Named Routes
- With our routing class created, we can now define our named routes in the MaterialApp widget. We can do this by passing in the routes Map from our routing class to the routes parameter of MaterialApp.
- In this example, we set our initialRoute to the 'home' route defined in our routing class and pass in our routes Map using the AppRoutes.routes getter.
Navigating to Named Routes
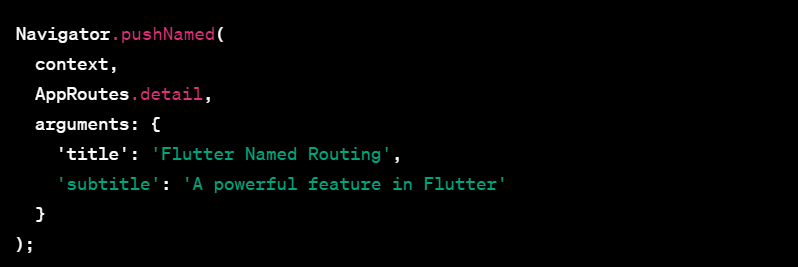
- With our named routes defined, we can now navigate between screens using named routing. To navigate to a named route, we can use the Navigator.pushNamed() method and pass in the name of the route we want to navigate to.
- In this example, we navigate to the 'detail' route defined in our routing class using the AppRoutes.detail constant.
Passing Arguments to Named Routes
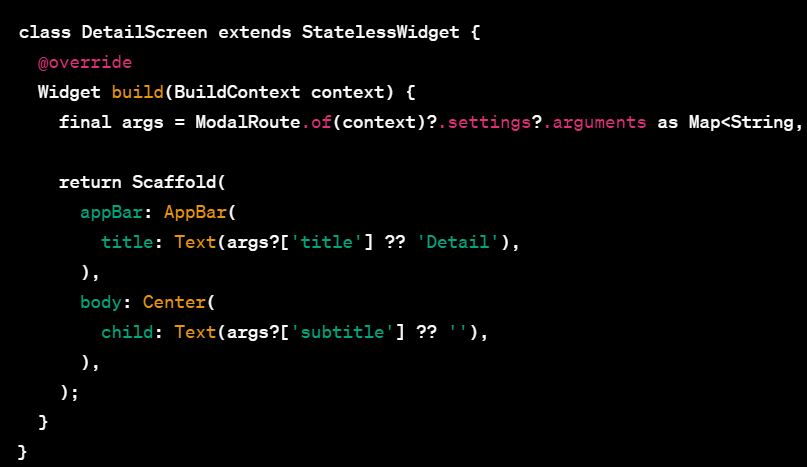
- Named routing also allows us to pass arguments to our destination screen. We can do this by passing a Map of arguments to the Navigator.pushNamed() method and accessing these arguments in our destination screen using the ModalRoute.of() method.
- In this example, we pass a Map of arguments to our 'detail' route using the Navigator.pushNamed() method. We can then access these arguments in our DetailScreen widget by using the ModalRoute.of() method.
- In this example, we use the null-aware operator (?.) to safely access our arguments and set our DetailScreen widget's title and subtitle accordingly.
Conclusion
- Using a routing class to implement named routing in Flutter can provide a more organized and reusable approach to navigation. By encapsulating our routes in a separate class, we can make our code more modular and easier to maintain. Additionally, by passing arguments to our named routes, we can further enhance the functionality and flexibility of our.


